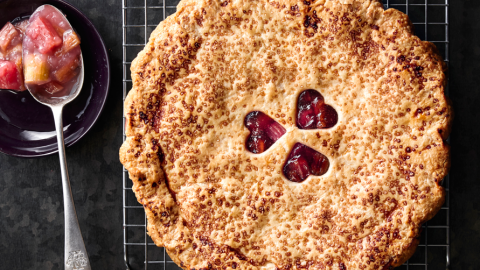
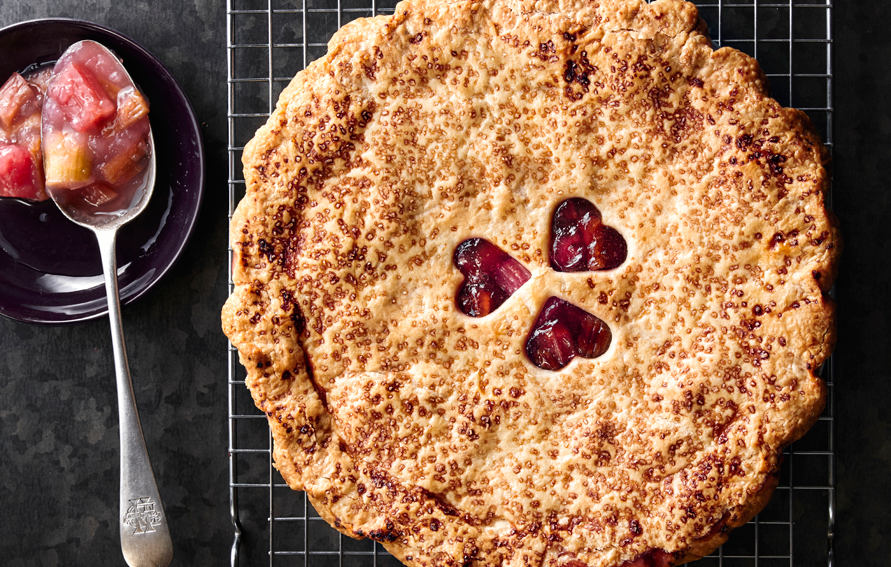
Just Rhubarb Rhubarb Pie
From Zingerman's Bakehouse Cookbook.
From Zingerman's Bakehouse Cookbook.
Making a pie crust is one of the most anxiety-provoking baking tasks we teach our students at our baking school, BAKE! Although the process is exacting, our professional pastry bakers don’t suffer from this high level of anxiety, and there’s no reason we can’t all get to their level of calm proficiency.
Why are we so anxious about making a pie crust? We’ve all eaten tough pie crusts in our lives, so we know that failure is a real possibility. We also keep hearing that it’s difficult to make a flaky and tender pie crust. Between what we’ve been told and what we’ve experienced, we’re primed to be anxious and insecure about our pie crust–making abilities. Let us show you that a good pie crust is completely achievable.
The recipe and process given here have been taught successfully to at least 2,000 home bakers at BAKE! None of them had pie crust–making super powers. You can learn too! We asked Anna, Frank’s oldest daughter, who had never made a pie crust before, to test our recipes for pecan and chocolate chess pies. Here’s what she said about making the crust: “I really liked your description and instructions of the various steps. I’ve never made a pie dough from scratch before and was somewhat intimidated, and this was empowering and well-written.” We hope you have the same experience.
Mix the Pie Dough
1. Cut the cold butter into 1⁄4-in [6-mm] cubes. In a large mixing bowl, mix the flour and salt with a fork. Add three-fourths of the cold butter to the bowl. Cut the butter into the flour mixture using a pastry blender, or two butter knives, or your fingers. Cut or work the butter into the flour until the mixture looks like coarse cornmeal. If using your fingers, break the butter chunks down and rub the butter and flour together. Pick the mixture up between your hands and rub your palms together as if they’re cold. This will break down the butter and rub it all over the flour. The flour will take on a creamy yellow color during this step. When you pick the mixture up in your hand, it should be possible to squeeze it into a mass that will hold together. When you see the color change, and the mixture holds together when squeezed, you know that you’ve worked the butter in enough. Work quickly so that the butter doesn’t become warm. The goal of this step is to cover the flour with fat so that the gluten strands are not able to develop. This will allow the dough to be short and tender. It is much more problematic to not break down the butter enough in this step than it is to break it down too much. Most of us don’t incorporate it enough. Try not to be hesitant in this step.
2. Add the remaining one-fourth of the butter and cut it into the mixture as before. These butter pieces should be left pea sized. The chunks of butter will create flakiness in the final pie crust—when they melt during baking, they will create steam, which separates layers of the coated flour, making flakes of crust.
3. Create a well in the center of the mixture. Add the chilled water. Using a fork, blend the water into the flour mixture. The mixture will still be crumbly in the bowl, but it should look moist. If it still looks dry, add an additional 1 to 2 Tbsp of water, until the mixture looks moistened but still crumbly.
4. If the butter has been rubbed into the dough adequately in step 1, the amount of water specified should be adequate. More water is usually necessary only when the butter has not been adequately distributed. It’s not desirable to add more water, because it tends to make a tougher crust.
5. Turn the mixture out onto a clean, unfloured work surface, form it into a mound, and push out sections of dough across the work surface with the heel of your hand. We call this “schmearing.” Push each section of dough once, not twice. Make sure to schmear enough so that the dough loses its dry, crumbly appearance. At the end of the schmearing, all of the pie crust will be pushed out flat on the work surface.
6. Fold the dough back onto itself with a bench scraper. Gather it into a ball, pressing it firmly so it holds together.
7. Cut the dough into two equal pieces, shape each into a disk, and wrap with plastic wrap. Chill for at least 1 hour before rolling it out.
Tip: The dough can stay in this form in the refrigerator for up to 5 days. It can also be frozen, well wrapped and preferably in an airtight container, for up to 3 months.
Roll Out a Single-Crust Pie Shell
1. Remove one piece of the chilled dough from the refrigerator. While the dough is still in the plastic wrap, firmly but gently tap on it with the rolling pin until it is flexible but still cold. Lightly dust the work surface with flour. Place the disk of unwrapped dough on the surface and lightly flour the top of the disk with flour.
2. Using a rolling pin, start rolling the dough from the center to the edge, away from you. Do not use too much pressure or the dough will crack.
3. Stop and give the dough a one-eighth turn. This rotation will prevent the dough from sticking to the work surface and will help make a perfect circle.
4. Reflour the work surface and the top of the dough to prevent the dough from sticking. Continue to roll and rotate the dough until it’s about 1⁄8 in [4 mm] thick and about 1 in [2.5 cm] bigger than the pie plate you will be using. Flour is your friend in this process. Use it liberally to avoid sticking.
5. When the crust has reached the correct size, use a pastry brush to brush away any extra flour from the top of the pie dough. Turn the dough over and brush off any extra flour from the bottom. One way to do this is to roll the dough up on your rolling pin and then unwind it with the bottom surface now facing up.
Fit the Dough into the Pie Plate
1. Using a rolling pin, gently roll the dough loosely around the rolling pin. Position the edge of the dough over the edge of the pie plate and unroll the dough. Gently ease the dough down into the pie plate, making sure not to stretch the dough.
2. To finish the edge of the pie shell, trim the edge, leaving 1⁄2 in [1.5 cm] of dough over the edge of the pie plate. Turn this extra dough under to make a neat thickened border.
3. Create a decorative edge with this border as you choose. A simple finish is to press the tines of a fork all around the edge or to press a spoon into the edge to make semicircles.
4. Now follow the directions in the specific pie recipe. The crust will either be used raw or blind baked. Blind-baking instructions are given next.
Tip: If you are not going to use the crust right now, wrap the unbaked crust well and it can stay in this form in the refrigerator for up to 5 days or in the freezer for 3 months.
Blind-Bake the Crust
1. Preheat the oven to 375°F [190°C].
2. Roll out a single pie crust and fit it into the pan, as just described. Dock the dough all over. This means to make tiny holes in the bottom and sides of the dough with a fork. All of these holes will allow the gas from the melting butter to escape without forming large air bubbles in your crust.
3. Refrigerate or freeze the pie shell for at least 20 minutes before baking. Remove the chilled pie shell from the refrigerator. Line the chilled crust with parchment paper, pressing it snugly against the bottom and sides. Fill with dried beans or pie weights to hold down the parchment.
4. Bake the crust for 25 minutes, or until the edge begins to color. Remove the parchment and the beans. Bake for another 5 minutes. At this point the pie shell is considered partially blind baked. For a fully blind-baked crust, bake for another 12 to 15 minutes after removing the parchment.
Make a Double-Crust Pie
1. Using one of the two pieces of pie dough, follow the directions given earlier for rolling out a single-crust pie shell and fitting it into the pie plate. However, trim the edge of the dough so at least 1 in [2.5 cm] of excess is hanging over the edge of the pie plate.
2. Follow the directions for creating the filling in the specific pie recipe you are making. Put the filling into the bottom crust. Brush the edge of the bottom crust with water.
3. Using the second piece of pie dough, roll the top crust out slightly larger than the top diameter of the pie plate, so that it will comfortably be able to cover your filling.
4. Roll up the top crust onto your rolling pin and, starting at one side of the pie, gently unroll the crust over the filling. If you do not place the crust perfectly, just move it gently with your hands to make it as evenly placed as possible. Trim the crusts, leaving 1 in [2.5 cm] of excess to form the border.
5. Now it is time to seal the edges. Fold the excess dough from the bottom crust over the edge of the top crust and seal by lightly pressing both layers together with your fingers against the top of the pie pan. Decorate the edge as you like. There are many different decorative edges to choose from. You can do a simple one by pressing the tines of a fork all around the edge of the pie. You can also press a spoon into the edge to make semicircles. Or you can pinch the dough with your fingers to make the classic fluted edge. Now cut at least four 2-in [5-cm] vents in the top of the crust at even intervals to allow the steam to escape as the pie bakes. Follow the directions for baking in the recipe of your choice.
WHICH FAT SHOULD I USE IN MY PIE CRUST?
Bakers have strong feelings about the kind of fat used in pie crusts—some use vegetable shortening, some use lard, and some use butter. And some use a combination. We’re fans of butter and lard. Generally we use butter because we think it gives better flavor to the crust and lard because it gives great texture. Lard has lots of flavor, but many of us are not used to it in our pie eating, so it’s not always enjoyed or it’s problematic for some of our customers to eat. Setting aside religious considerations, mixing butter and lard can be a fantastic choice. The butter and lard flavors blend well, and the crust gets a combination of crispness from the butter and flakiness from the lard.
If you are going to use lard, try to find unrendered leaf lard. Leaf lard is the fat that surrounds the kidneys of pigs, and it tends to be the most pure. Unrendered lard is preferred because it still contains the molecular structure of the fat, which contributes to the flakiness of the crust. Rendered fat destroys the crystals by melting them. If you do find unrendered leaf lard, remove any extra membranes and fascialike material, and then cut it into cubes just as you would butter.
Why not use vegetable shortening? Basically, shortening has less flavor than either butter or lard and doesn’t color as nicely as butter, so we avoid it because we’re all about flavor. Shortening also contains a high amount of trans fats, which many of us don’t want to eat. Shortening does have its advantages, though. It’s less expensive relative to other fats and has a long shelf life, and it definitely makes a nicely textured crust. It is also easier to use, so it may be a good fat to use when you’re learning to make a crust. Shortening is often used in Jewish baking because the baked good can be eaten with a dairy or meat meal.
It’s your pie, so you choose! If you make a lot of pies, try experimenting with different fats and assess the result.
Copyright ©2025 Edible Indy. All rights reserved |Edible Indy Foundation